Difficulty
Moderate
Steps
20
Time Required
00:15:00 - 00:45:00
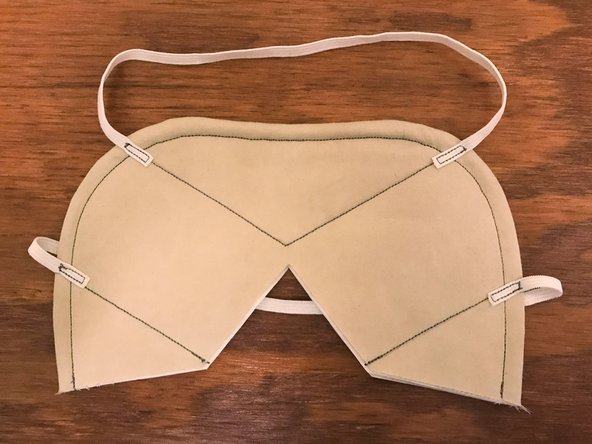
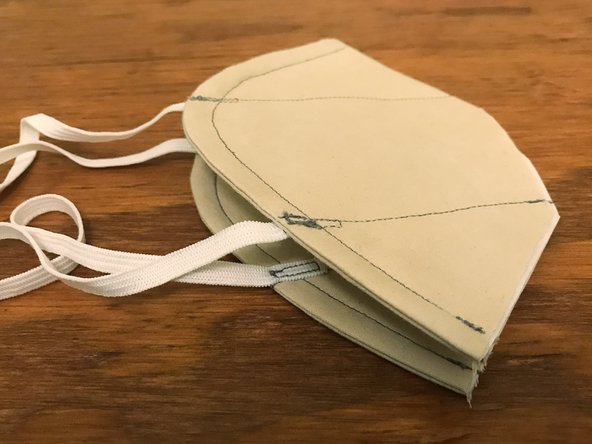
- How to make an N95-style facemask 20 steps

In Progress
This guide is currently being written. Reload periodically to see the latest changes.
Quiz
0
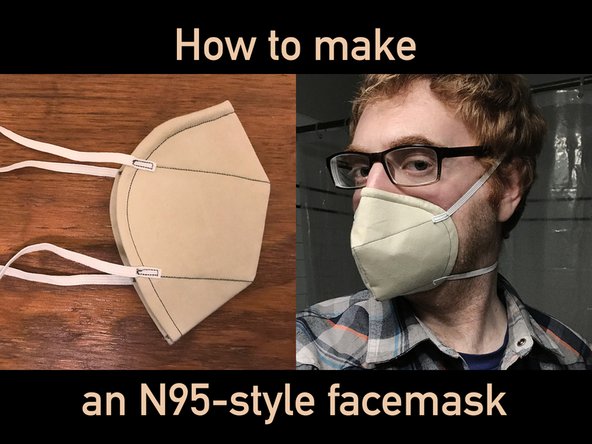
Introduction
As of today (March 31, 2020) there's a severe shortage of PPE (personal protective equipment) in the United States as we face the COVID-19 pandemic. Many people have been making masks at home in an effort to provide a minimum of protection to frontline healthcare workers, and some hospitals have begun accepting donations of these homemake masks.
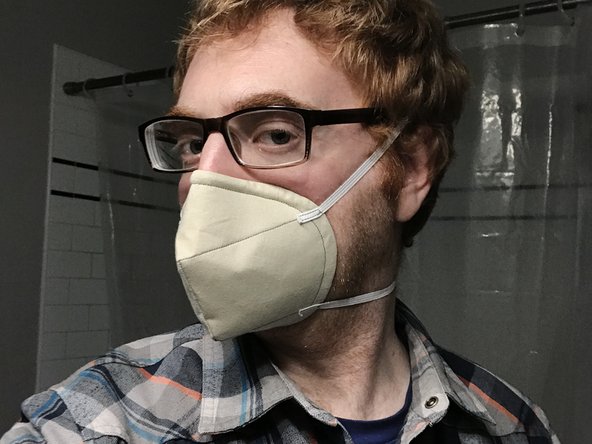
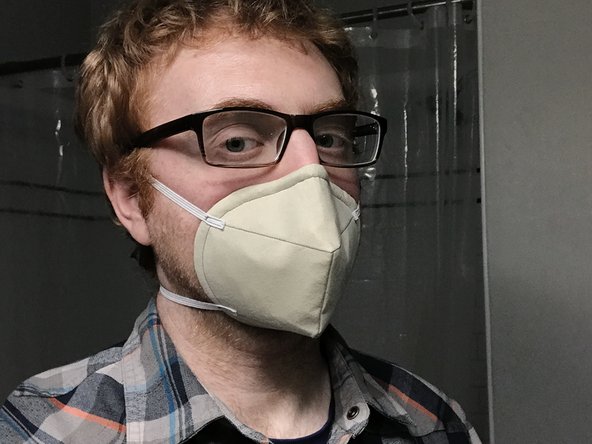
I began making surgical-style masks at home, for which there are many online guides, but found them to be frustratingly uncomfortable and seemingly ineffective, as they fail to form even a rudimentary seal around the wearer's nose and mouth. Instead, I decided to try and make a smaller, more comfortable, and potentially more effective homemade mask in the style of certain disposable Chinese KN95 masks that are available online (KN95 is roughly equivalent to the N95 specification in the United States).
This design has gone through several iterations and seems to work well. It uses less material than a homemade surgical-style mask, is more comfortable to wear (in my opinion), is reasonably easy to sew (even for a beginner like me), and it offers arguably better protection by eliminating any large air gaps.
Warning
Please note that this mask has NOT been rated or certified in any way whatsoever. Its effectiveness will depend entirely on the quality of construction, the particular materials used, and how it fits on the person wearing it. Similar to manufactured N95 masks, this mask should NOT be used by anyone with a beard. This mask may provide better protection than a bandana or a surgical-style mask, but it should NEVER be used EXCEPT when medical-grade equipment is UNAVAILABLE.
Disclaimer
I am not a healthcare professional. This design has not undergone any laboratory or field testing. No warranty is implied or provided. Use at your own risk. Please use common sense, and please be safe out there.
License
The mask pattern PDF and the text of this step-by-step guide are licensed CC BY-SA. That means you can use or modify these materials for any reason you want, including commercial purposes, as long as you provide attribution, and that any derivative work is released under the same license.
-
-
Start by gathering all the tools you need to make the mask:
-
A sewing machine. Pretty much any basic machine will be fine since we won't be doing anything fancy.
-
If you don't have a sewing machine, you can do all the sewing by hand but it will take much, much longer. Donated sewing machines are available in some communities for people volunteering to make masks. Ask around.
-
Thread. Any kind or color is fine, as long as it works with your machine.
-
Scissors that are able to cut through several layers of fabric.
-
A pencil, or anything that can leave a light mark on your fabric.
-
Pins. You only need 5 or so. The tomato is optional, but adorable.
-
Tape measure. Nice to have, but you can probably get by without one.
-
-
-
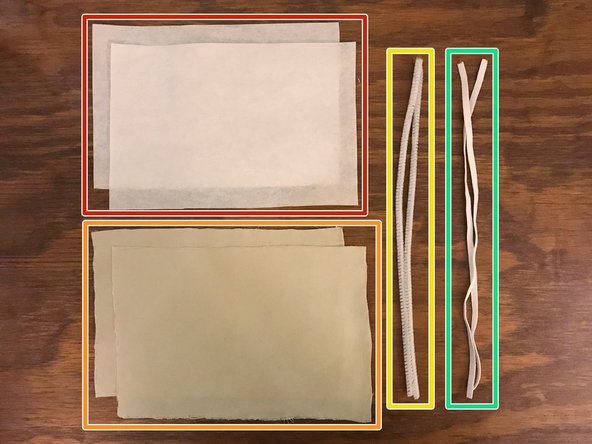
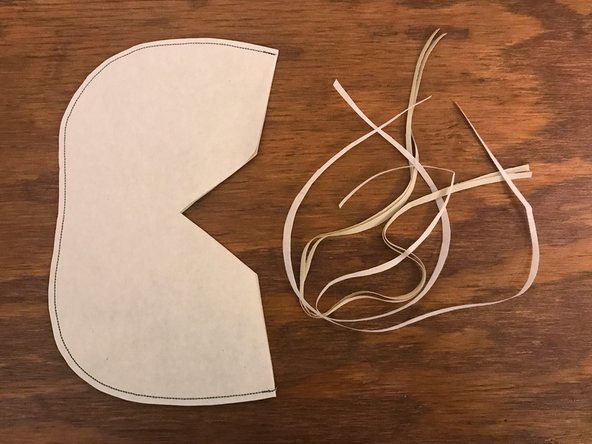
Gather the supplies you need to construct the mask:
-
Two 6" x 9" sheets of non-woven interface material. These give the mask structure and provide additional filtering of particles.
-
Two 6" x 9" sheets of high thread-count cotton fabric. I used an old pillowcase and bleached it first.
-
Two 12" long pipe cleaners. Four 6" long pipe cleaners will work too.
-
I suspect that aluminum armature wire would also work well here. Pipe cleaners provide padding and are easy to find.
-
Two 12" long pieces of 1/4" wide woven elastic band. Slightly thicker elastic band should also be fine.
-
I think non-elastic straps are annoying for this kind of mask, but you can use them if you don't have any elastic. You need to make them long enough to be able to be tied, so I'd recommend starting with at least 20" for each individual strap.
-
-
-
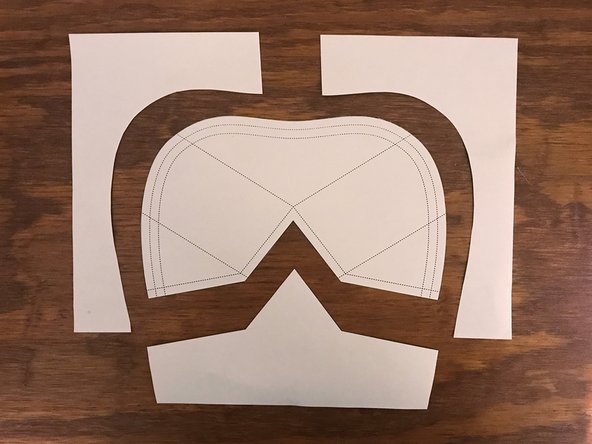
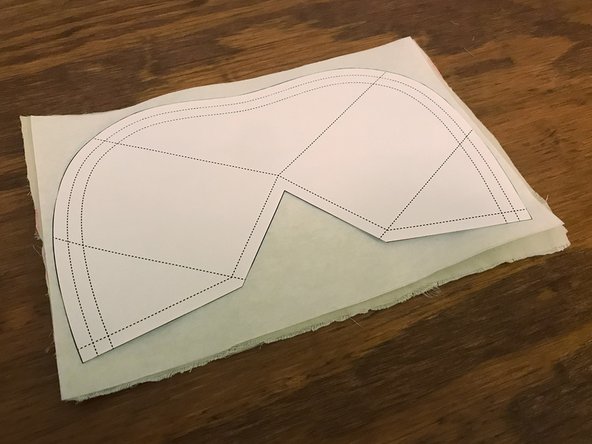
Download the mask pattern PDF to your computer or device.
-
Print the pattern with any printer onto a regular sheet of copy paper.
-
The document must be printed at exactly 100% scale. Do not allow the pattern to be scaled down or automatically scaled to the size of the paper.
-
After being printed, the pattern (at its widest points) should measure just about 8-3/4" wide and 5-1/4" tall.
-
-
-
Use your scissors to carefully cut out the pattern, following the solid black line.
-
Recycle the paper scraps.
-
-
-
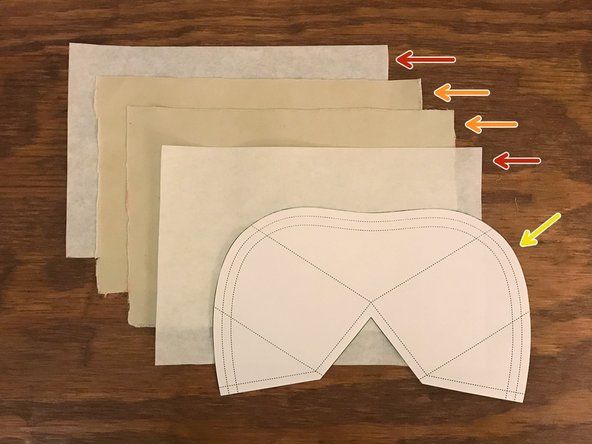
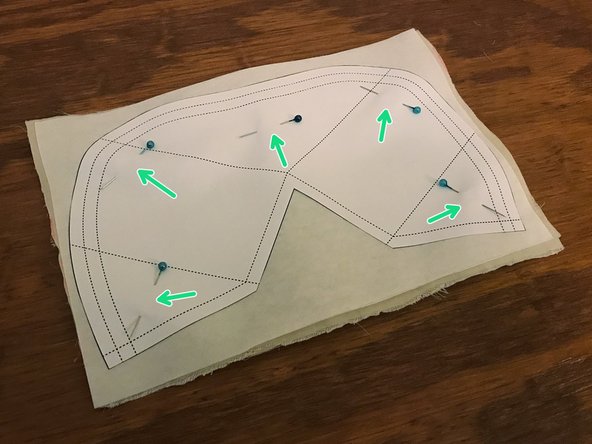
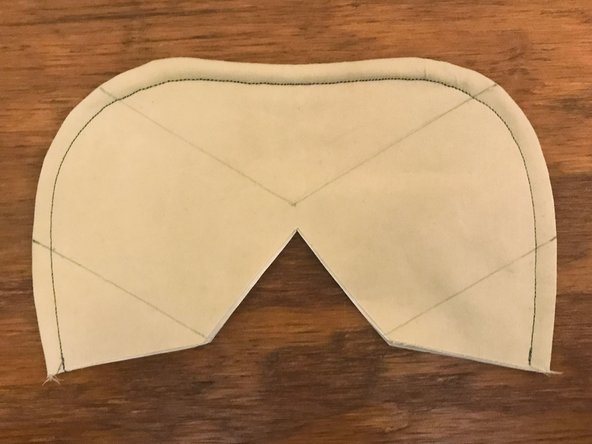
Stack the mask material in the following order, from the bottom up:
-
One sheet of interface material.
-
One sheet of cotton fabric, with the front side facing up.
-
The second sheet of cotton fabric, with the front side facing down.
-
The orientation of the fabric only matters if you're using a printed fabric that has a distinct front and back. In this stack, the front sides should be facing each other. I'm using plain fabric with no particular orientation, so both sides are the same.
-
The second sheet of interface material.
-
The cut pattern, facing up.
-
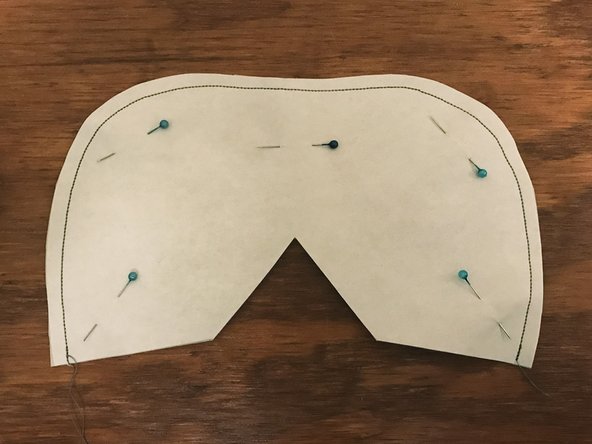
Insert pins through all the layers of the stack. Make sure there are no wrinkles or bunches, and that the pattern does not extend beyond any of the edges.
-
-
-
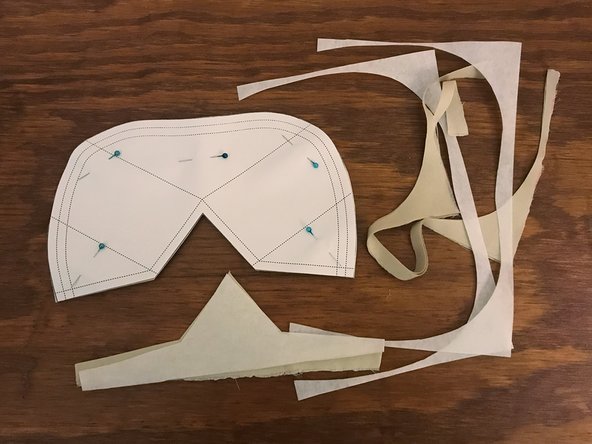
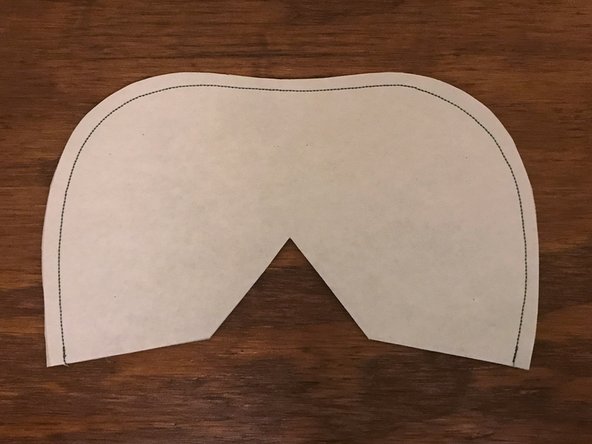
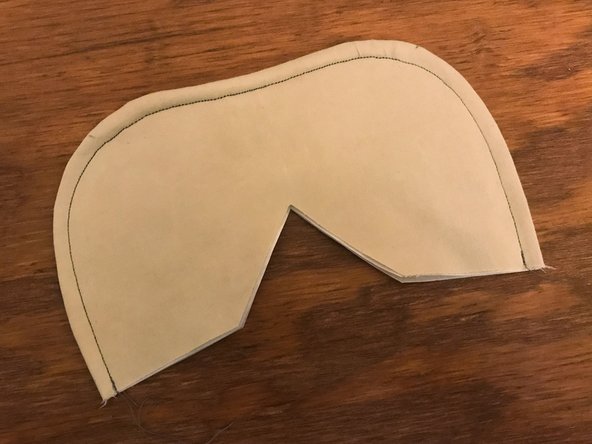
Carefully cut around the outside edge of the pattern, through all four layers of material.
-
Discard the fabric and interface scraps.
-
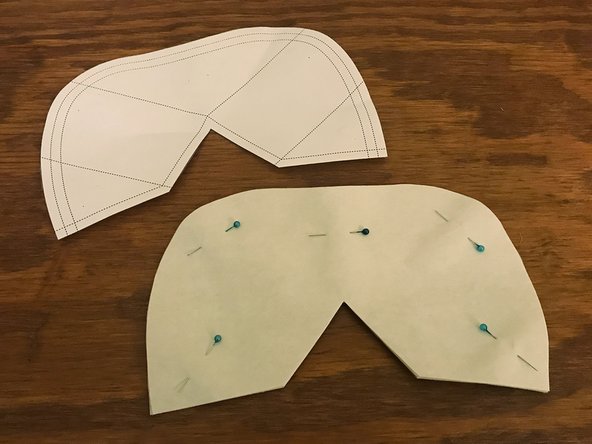
Remove the pattern from the stack.
-
If you remove and replace only one pin at a time, the rest of the pieces will stay perfectly aligned.
-
-
-
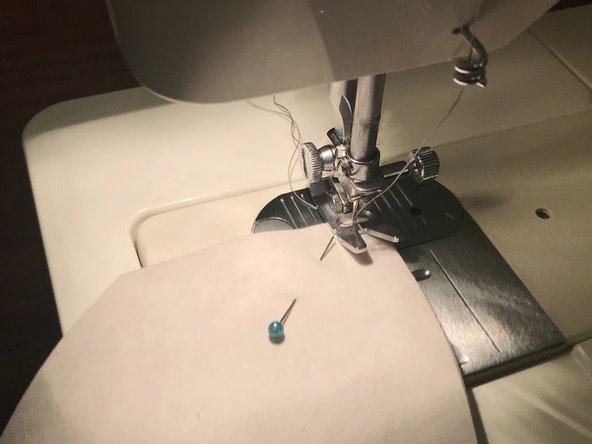
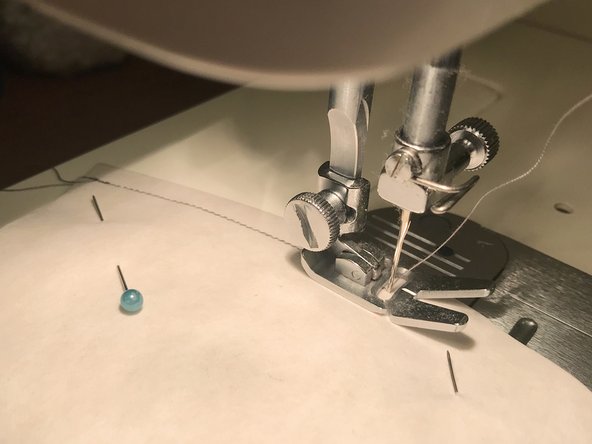
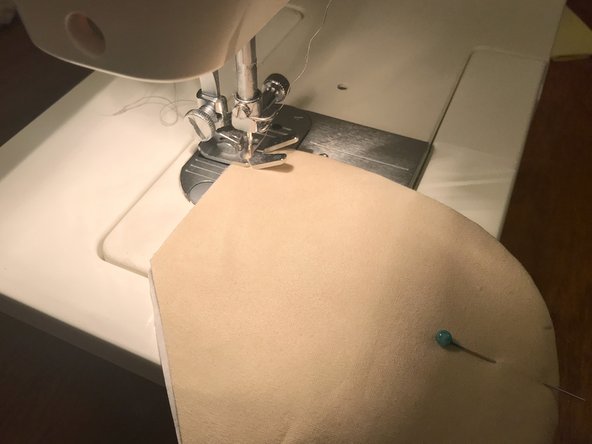
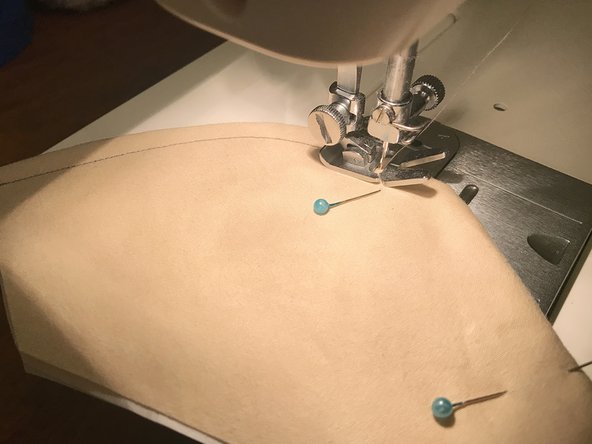
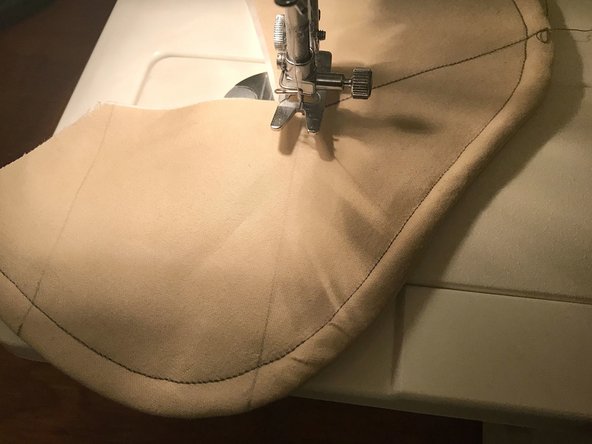
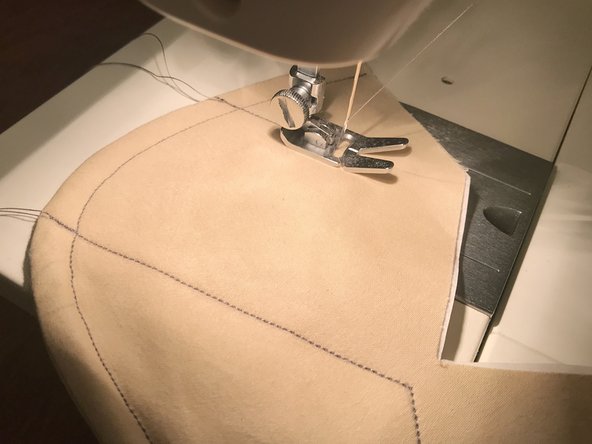
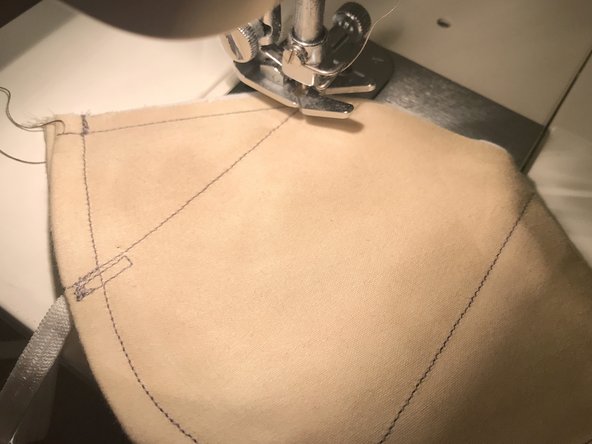
Starting at one corner, sew along the entire length of the curved edge.
-
I recommend using a stitch length of around 2 for this step, and on all future sewing steps.
-
At the beginning and end of your stitching, make sure to go forward and backward about 3-4 stitches to prevent the thread from unravelling.
-
Don't forget to repeat these beginning and ending overlapping stitches on all future sewing steps.
-
Your stitching line should be about 1/4" away from the edge of the material.
-
On many sewing machines, you can simply line up the edge of the material with the edge of the presser foot to achieve this spacing.
-
If any pins are in your way, you can simply remove them as you sew.
-
-
-
Remove any remaining pins.
-
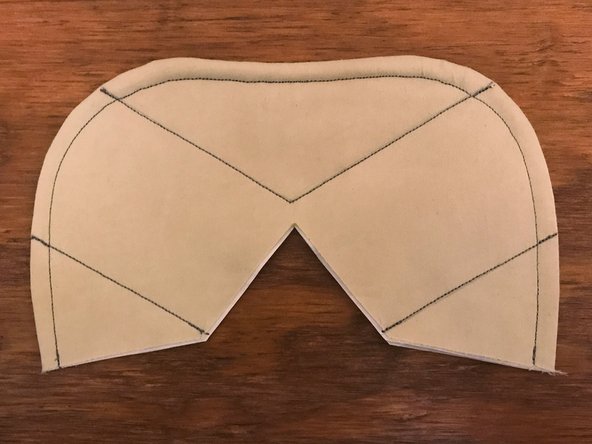
Trim down the edge that you just sewed, leaving a border of about 1/8" between your stitching and the cut edge.
-
Discard the trimmed scraps.
-
-
-
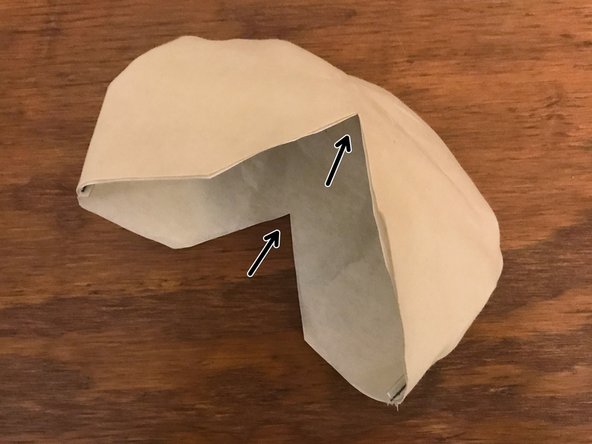
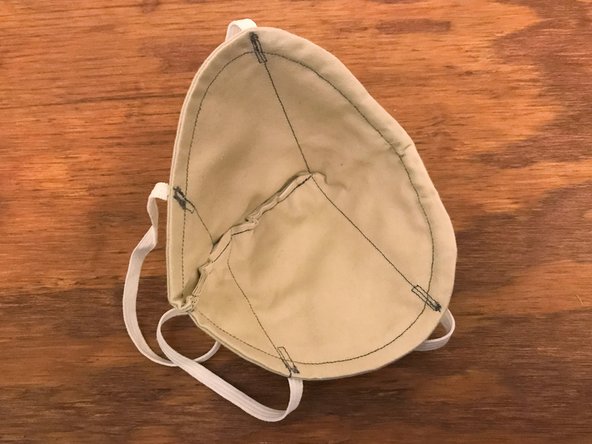
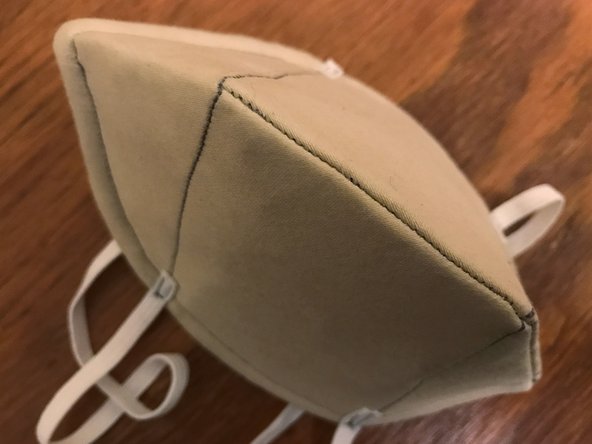
Carefully turn the mask inside out. The stiffness of the interface material might make this a little difficult. Go slowly.
-
Be especially careful not to tear the interface material while doing this, especially at the two inner sharp angles (marked with arrows).
-
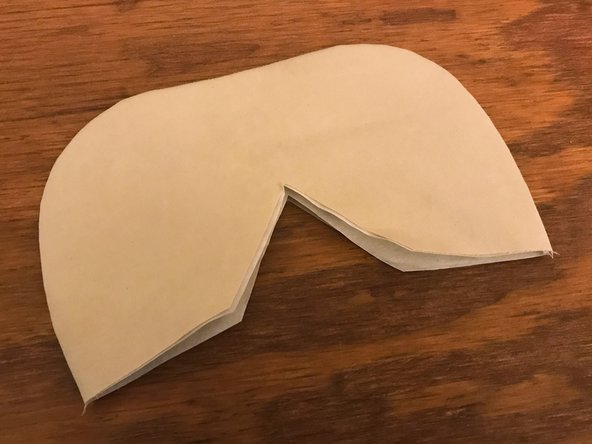
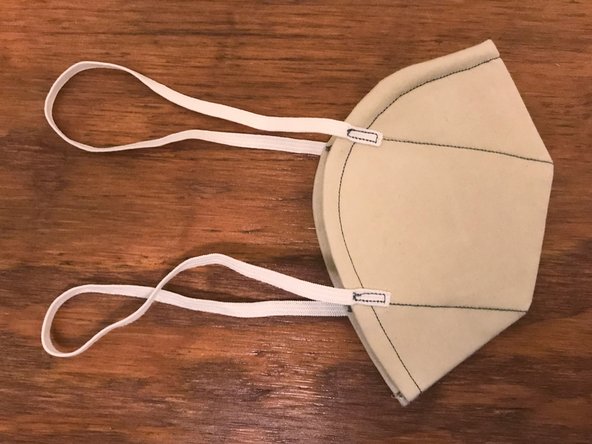
Flatten the mask. Run your fingers along the inside of the seam to push it all the way out, then press the seam down from the outside to flatten it.
-
You probably won't need to iron the flattened seam, as long as the interface material that you're using has enough stiffness.
-
-
-
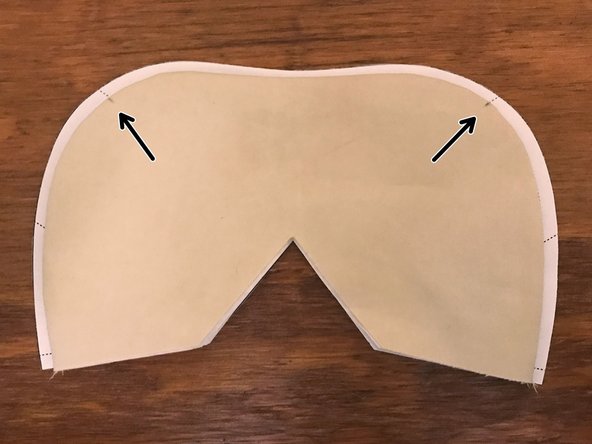
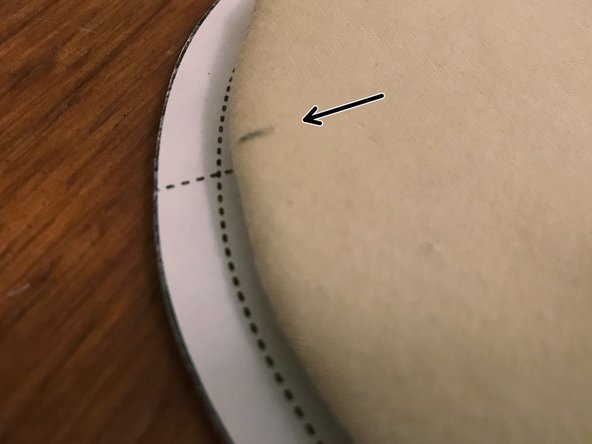
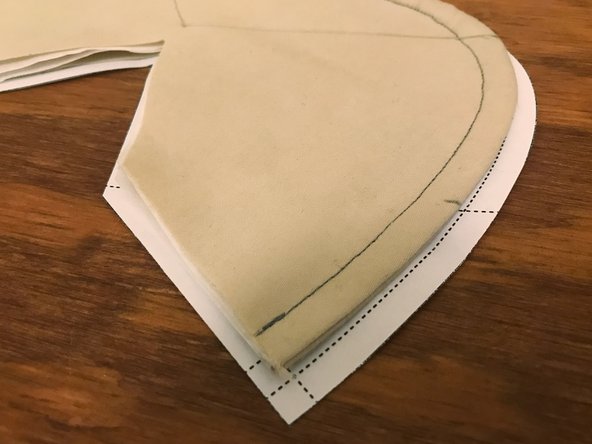
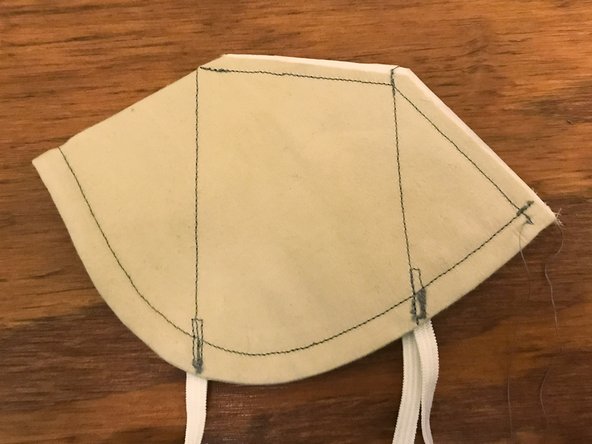
Place the mask on top of the pattern. Line up the bottom straight edges.
-
Make two small marks along the edge of the mask where the dashed lines on the pattern intersect it, as shown.
-
-
-
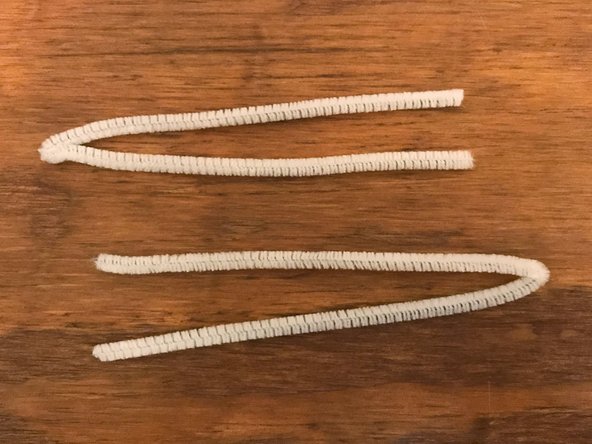
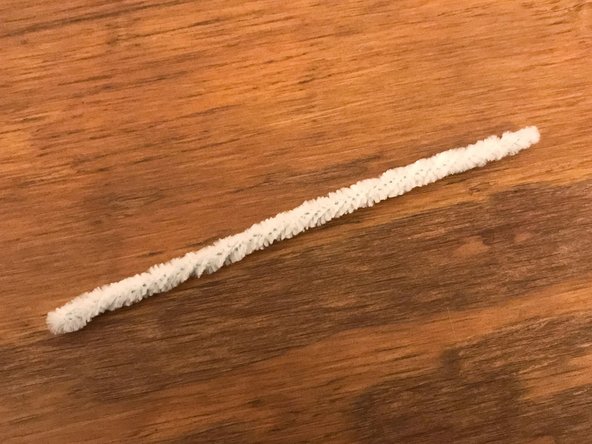
Take the two 12" pipe cleaners and fold them each in half.
-
If you're using different length pipe cleaners, your goal is to end up with a 6" length made up of 4 strands.
-
Twist the pipe cleaners together to create a single piece.
-
If you're using a different insert material, you should make it into something that's roughly the same size and shape.
-
-
-
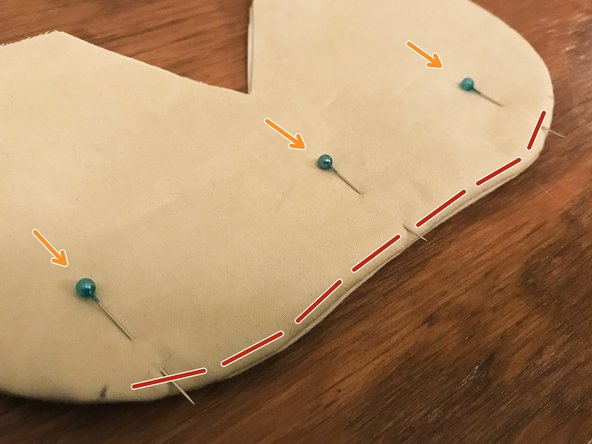
Place the prepared nose bridge insert inside the mask, between the two layers of interface material.
-
Push the insert all the way into the seam, so it's as close to the top edge of the mask as possible.
-
Use the two marks you made in the previous step to align the insert and center it.
-
The insert should be slightly shorter than the distance between the two marks, and it should not extend beyond either mark.
-
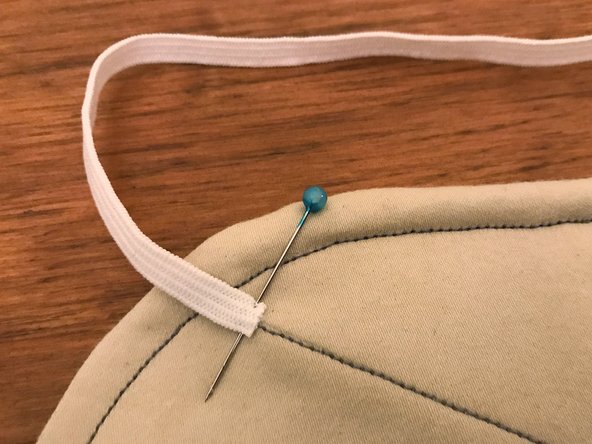
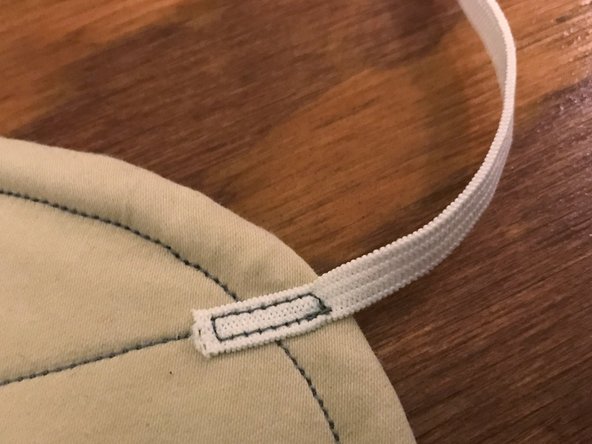
Use several pins to the hold the insert in place against the seam.
-
-
-
Insert wisdom here.
-
-
-
Insert wisdom here.
-
-
-
Insert wisdom here.
-
-
-
Insert wisdom here.
-
-
-
Insert wisdom here.
-
-
-
Insert wisdom here.
-
-
-
Insert wisdom here.
-
-
-
Insert wisdom here.
-


Attached Documents
