
Introduction
Updated on August 14, 2020: I've been making many of these masks using Halyard H600 medical sterilization wrap material for the inner filter layers, and I highly recommend it. This material is easy to work with, gives the mask just the right amount of stiffness, and provides effective filtration of particulates.
In the spring of 2020 I began making surgical-style masks at home, for which there are many online guides, but found them to be frustratingly uncomfortable and seemingly ineffective, as they fail to form even a rudimentary seal around the wearer's nose and mouth. Instead, I decided to try and make a smaller, more comfortable, and potentially more effective homemade mask in the style of certain disposable half-face respirators.
Wikipedia says, "a respirator is a device designed to protect the wearer from inhaling hazardous atmospheres." By attempting to create a proper seal between the user's face and the edges of the mask, inhaled air is forced through the filter material and not through gaps between the mask and the user's face.
This design has gone through several iterations and seems to work well. It uses less material than a homemade surgical-style mask, is more comfortable to wear (in my opinion), is reasonably easy to sew (even for a beginner like me), and it offers arguably better protection by eliminating any large air gaps.
Warning
Please note that this mask has NOT been rated or certified in any way whatsoever. Its effectiveness will depend entirely on the quality of construction, the particular materials used, and how it fits on the person wearing it. This mask should NOT be used by anyone with a beard. This mask may provide better protection than a bandana or a surgical-style mask, but it should NEVER be used EXCEPT when medical-grade equipment is UNAVAILABLE.
Disclaimer
I am not a healthcare professional. This design has not undergone any laboratory or field testing. No warranty is implied or provided. Use at your own risk. Please use common sense, and please be safe out there.
License
The face mask pattern PDF and this step-by-step guide are licensed CC BY-SA. That means you can use or modify these materials for any reason you want, including commercial purposes, as long as you provide attribution, and that any derivative work is released under the same license.
-
-
Start by gathering all the tools you need to make the mask:
-
A sewing machine. Pretty much any basic machine will be fine, since we won't be doing anything fancy.
-
If you don't have a sewing machine, you can do all the sewing by hand, but it will take much, much longer. Donated sewing machines are available in some communities for people volunteering to make masks. Ask around.
-
Thread. Any kind or color is fine, as long as it works with your machine.
-
Scissors that are able to cut through several layers of fabric at once.
-
A pencil, or anything that can leave a light mark on your fabric.
-
Pins. You only need 5 or so. The tomato is optional, but adorable.
-
Tape measure. Nice to have, but you can probably get by without one.
-
-
-
Gather the supplies you need to construct the mask:
-
Two 6" x 9" (15 x 23 cm) sheets of non-woven interface material. These give the mask structure and provide additional filtering of particles. Standard melt-blown filter material comes on rolls that are 6.89'' (17.5 cm) wide and sold in lengths of 5-100 meters.
-
Two 6" x 9" (15 x 23 cm) sheets of high thread-count cotton fabric. Look for muslin (plain woven cotton fabric) with a thread-count of 200 or higher. Old pillowcases are great.
-
If possible, I recommend using two different fabrics, one lighter (for the inside) and one darker (for the outside).
-
Two 12" (30 cm) long pipe cleaners. Four 6" (15 cm) long pipe cleaners will work too.
-
I suspect that aluminum armature wire would also work well here. Pipe cleaners provide padding and are easy to find.
-
Two 12" (30 cm) long pieces of 1/4" (or 6 mm) wide woven elastic band. Slightly thicker elastic band should also be fine. This material is often found on 100-200 yard spools.
-
I think non-elastic straps are annoying for this kind of mask, but you can use them if you don't have any elastic. You need to make them long enough to be able to be tied, so I'd recommend starting with at least 20" (0.5 m) for each individual strap.
-
-
-
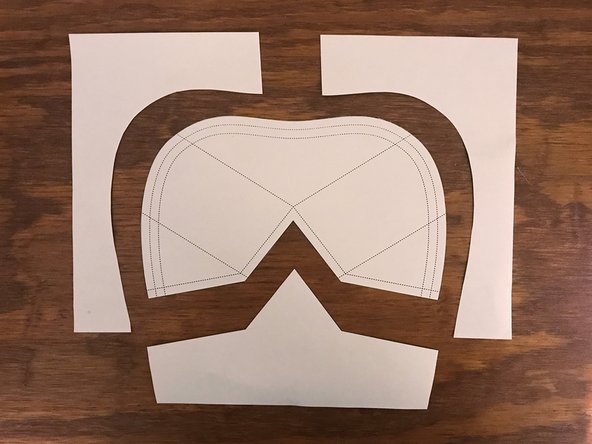
Download the face mask pattern to your computer or device.
-
Print the pattern with any printer onto a regular sheet of copy paper.
-
The document should be printed at exactly 100% scale. Do not allow the pattern to be scaled up or down, unless you explicitly want to make a smaller or larger mask.
-
After being printed, the unscaled pattern (at its widest points) should measure just about 8-3/4" (22 cm) wide and 5-1/4" (13 cm) tall.
-
-
-
Use your scissors to carefully cut out the pattern, following the solid black line.
-
Recycle the paper scraps.
-
-
-
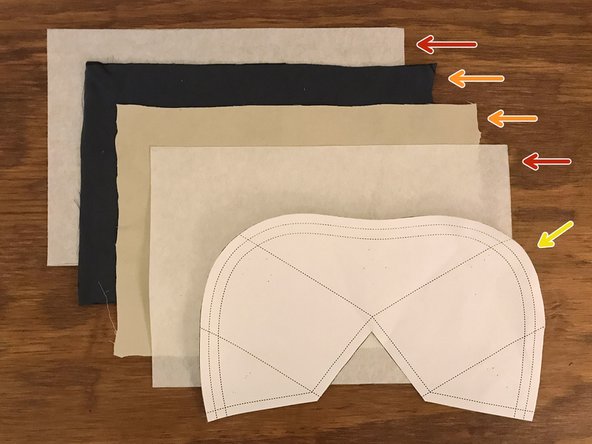
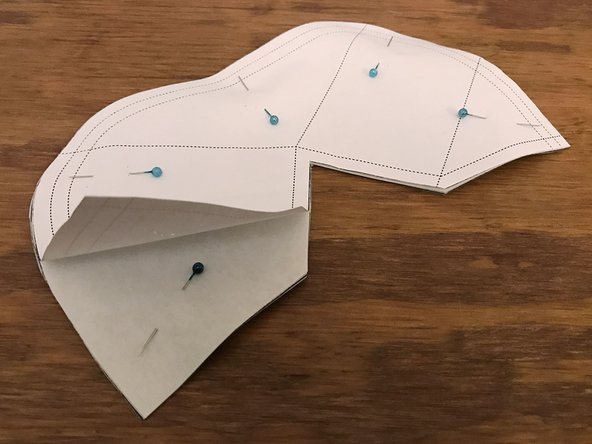
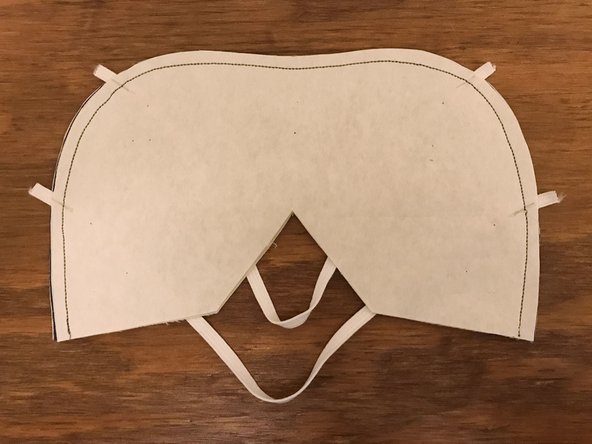
Stack the mask material in the following order, from the bottom up:
-
One sheet of interface material.
-
One sheet of cotton fabric, with the front side facing up.
-
The orientation of the fabric only matters if you're using a printed fabric that has a distinct front and back. In this stack, the front sides should be facing each other. I'm using plain fabric and both sides are the same.
-
The second sheet of cotton fabric, with the front side facing down.
-
The second sheet of interface material.
-
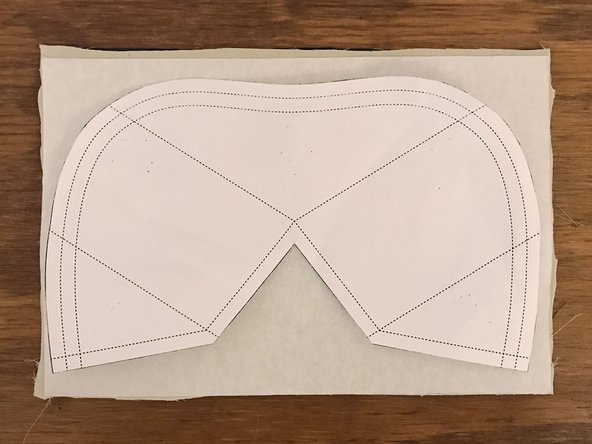
The cut pattern, facing up.
-
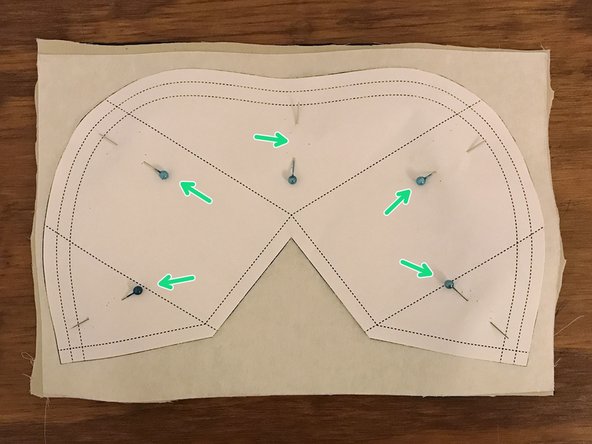
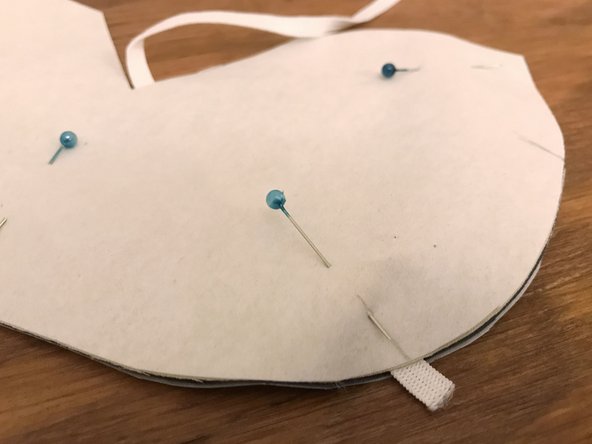
Insert pins through all the layers of the stack. Make sure there are no wrinkles or bunches, and that the pattern does not extend beyond any of the edges.
-
-
-
Carefully cut around the outside edge of the pattern, through all four layers of material.
-
Discard the fabric and interface scraps.
-
Remove the pattern from the stack.
-
You can remove one pin, bend the pattern out of the way, then reinsert the pin in the same spot. If you repeat this for each pin, one at a time, you won't have to realign the fabric layers.
-
-
-
Place the stack on top of the pattern.
-
Slide the stack over a tiny amount to the left so you can see the dashed lines along the right edge.
-
Mark the locations of the two lines with a pencil on the top layer of interface material.
-
Slide the stack over in the opposite direction and do the same thing for the two lines on the left side.
-
-
-
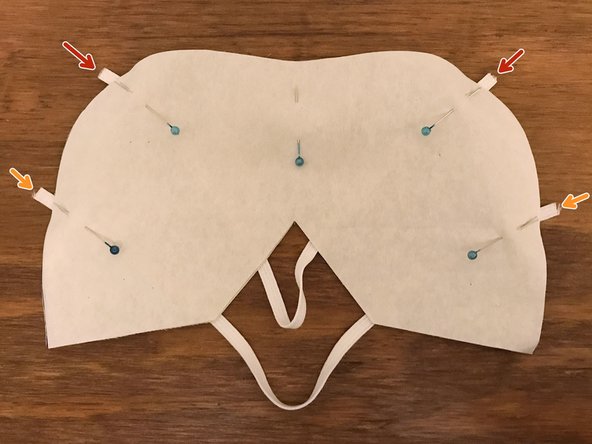
Remove an existing pin if necessary to make room, and place one of the 12" (30 cm) elastic straps between the two layers of cotton fabric.
-
Make sure the elastic straps are inserted between the correct layers!
-
Position the strap so that it runs between one of the upper points that you just marked and the top of the V-shaped cutout.
-
Leave about 1/4" (6 mm) of the elastic extending beyond the curved edge.
-
Insert a pin through the elastic to hold it in place, as shown.
-
Making sure there are no twists in the elastic strap, position the other end similarly on the opposite side of the mask, and pin it in place.
-
Repeat this process for the lower strap. Angle each side so that it runs toward the closest shallow bottom point.
-
-
-
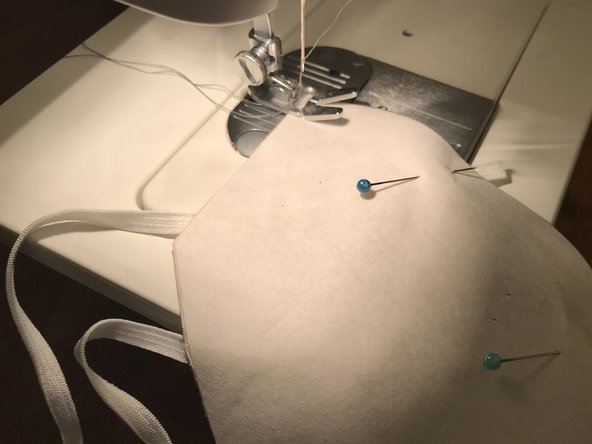
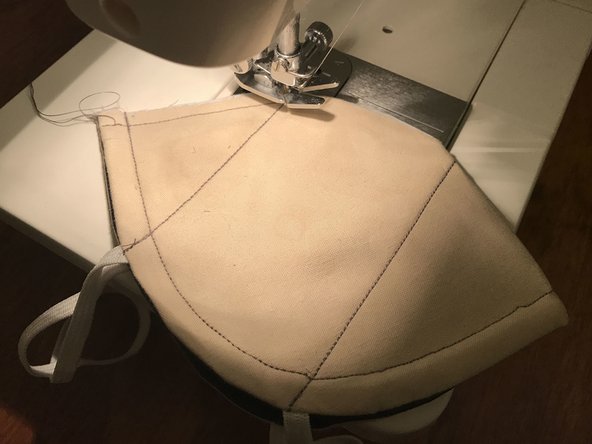
Starting at one corner, sew along the entire length of the curved edge.
-
I recommend using a stitch length of around 2 mm for this step, and on all future sewing steps.
-
At the beginning and end of your stitching, make sure to go forward and backward about 3-4 stitches to prevent the thread from unravelling.
-
Don't forget to repeat these beginning and ending overlapping stitches on all future sewing steps.
-
Your stitching line should be about 1/4" (6 mm) away from the edge of the material.
-
On many sewing machines, you can simply line up the edge of the material with the edge of the presser foot to achieve this spacing.
-
If any pins are in your way, you can simply remove them as you sew. When you're done sewing, remove any remaining pins.
-
After you finish (and after all future sewing steps) trim away all excess threads with your scissors.
-
-
-
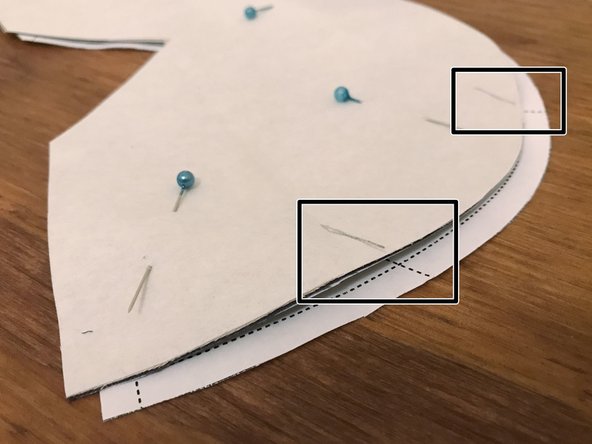
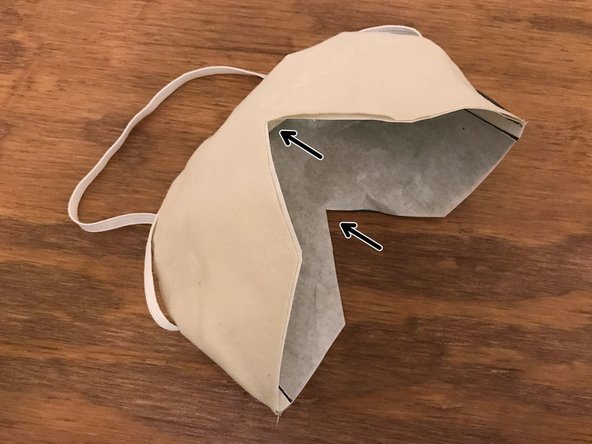
Carefully turn the mask inside out. The stiffness of the interface material might make this a little difficult. Go slowly.
-
Be especially careful not to tear the interface material while doing this, especially at the two inner sharp angles (marked with arrows).
-
Flatten the mask. Run your fingers along the inside of the seam to push it all the way out, then press the seam down to flatten it.
-
You probably won't need to iron the flattened seam, as long as the interface material that you're using has enough stiffness.
-
-
-
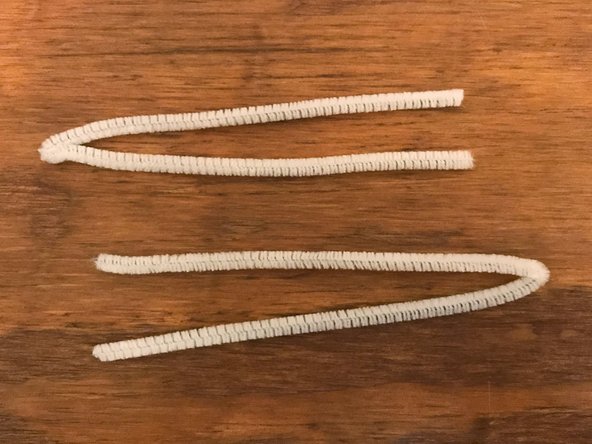
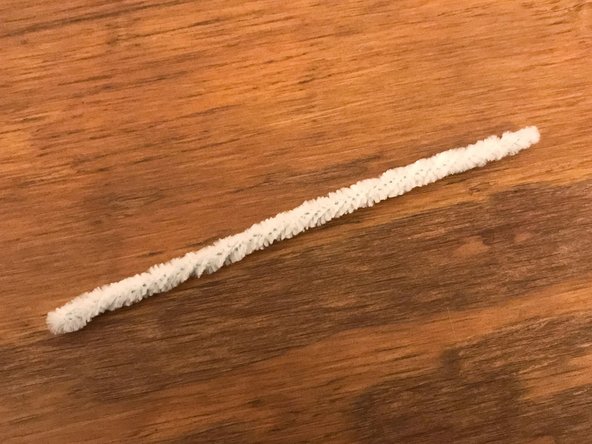
Take the two 12" (30 cm) pipe cleaners and fold them each in half.
-
If you're using different length pipe cleaners, your goal is to end up with a 6" (15 cm) length made up of 4 strands.
-
Twist the pipe cleaners together to create a single piece.
-
If you're using a different insert material, you should make it into something that's roughly the same size and shape.
-
-
-
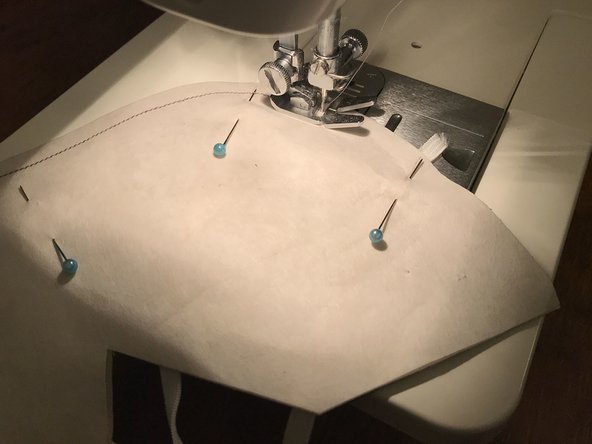
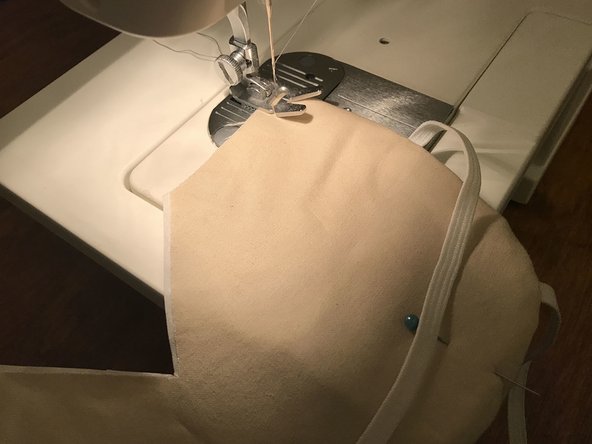
Place the prepared nose bridge insert inside the mask, between the two layers of interface material.
-
Push the insert all the way into the seam, so it's as close to the top edge of the mask as possible.
-
Use the two marks you made in the previous step to align the insert and center it.
-
The insert should be slightly shorter than the distance between the two strap attachment points, and it should not extend beyond either point.
-
Use several pins to the hold the insert in place against the seam.
-
-
-
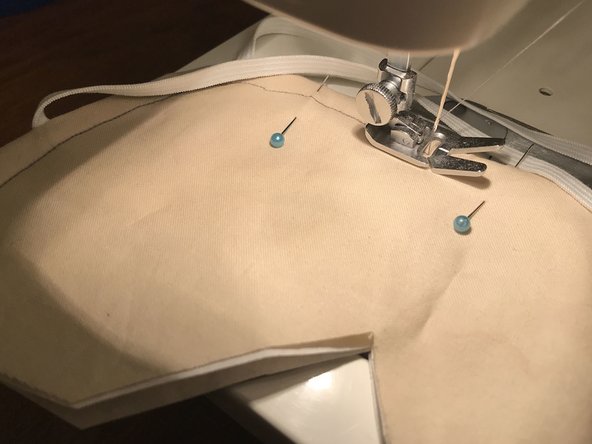
Starting from one corner, sew around the curved part of the mask, leaving a 1/4" (6 mm) gap from the edge, just like you did before.
-
Make sure to keep the elastic bands out of the way. This can be a little bit tricky, but isn't too hard.
-
Be careful when you get to the nose bridge insert. Make sure that it stays pushed up against the seam. The presser foot will sit at an angle while you sew along the insert.
-
Remove pins as you proceed, if necessary.
-
-
-
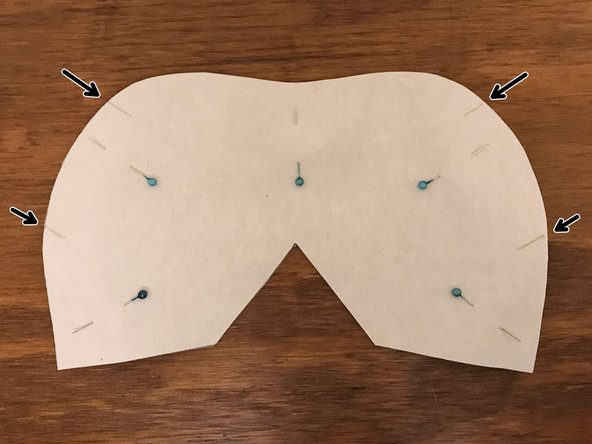
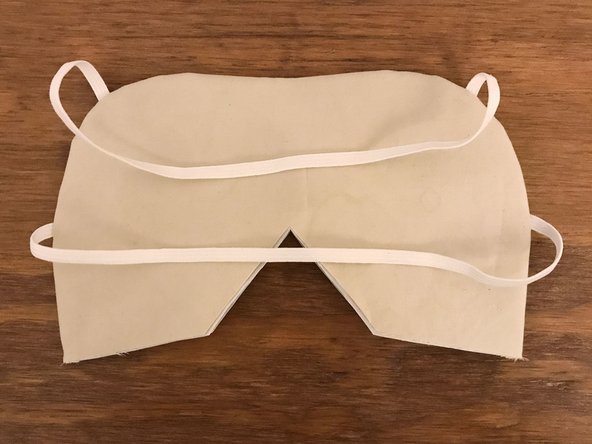
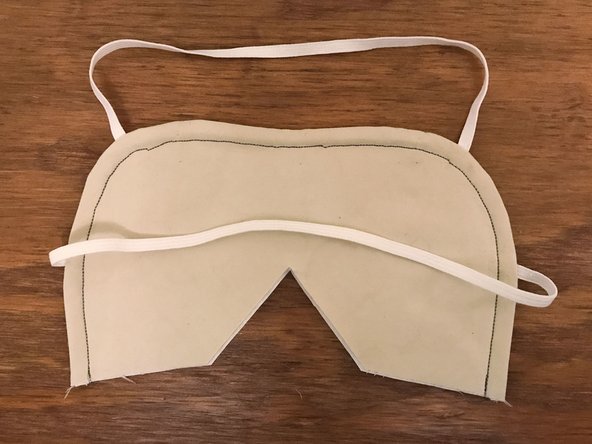
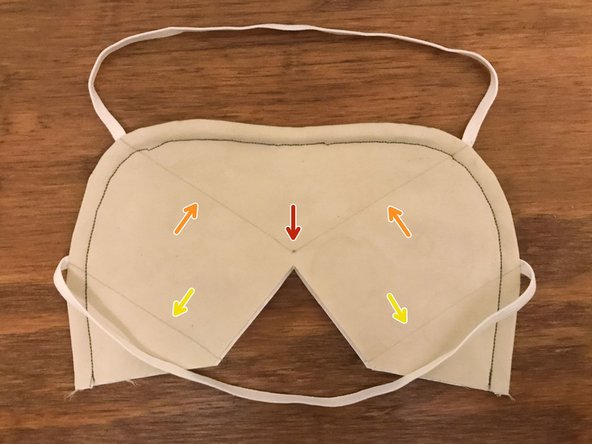
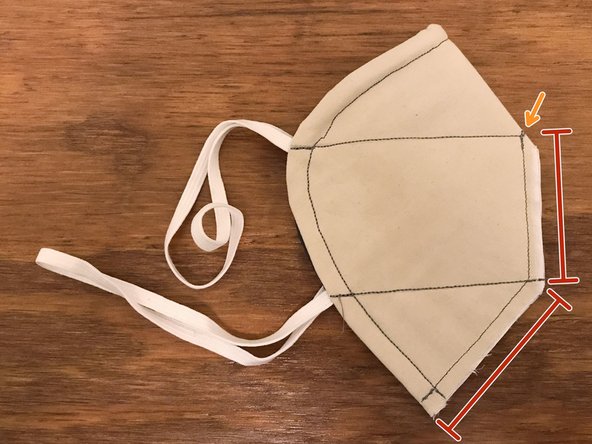
Mark a point on the mask that's about 1/4" (6 mm) above the center of the V-shaped cutout.
-
Draw two straight lines connecting that point to the two points where the upper strap connects to the mask.
-
Draw two more straight lines connecting the two points where the lower strap connects to the mask to points about 1/8" (3 mm) above the shallow angles along the bottom edge of the mask, as pictured.
-
-
-
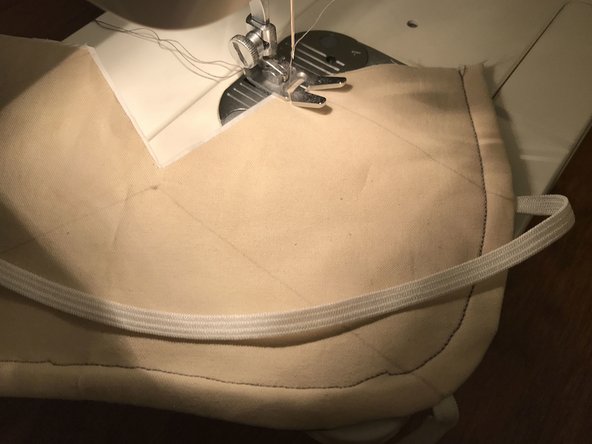
Sew along all four of the straight lines that you just drew, extending all the way to the edges of the mask. Be careful to avoid the elastic straps.
-
The two upper lines can be sewn in one continuous operation. When you get to the center point, make sure that the needle is down, lift up the presser foot, rotate the mask around the needle, then put the foot back down before continuing to sew.
-
-
-
Fold the mask in half, aligning the two bottom corners with each other.
-
The mask should be inside-out, so that the inside of the mask (lighter fabric, if applicable) is facing out.
-
You can pin the mask together if you want, but it was stiff enough that I didn't need to.
-
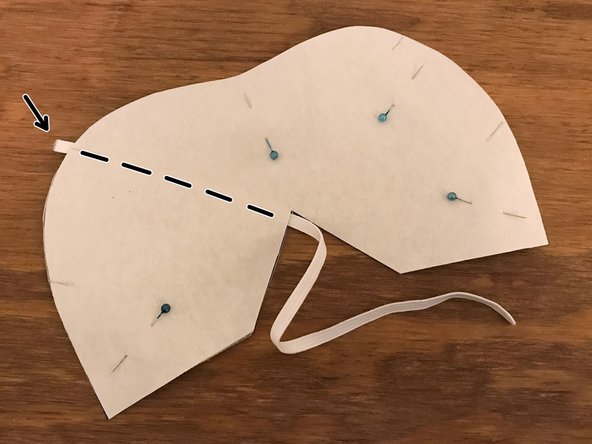
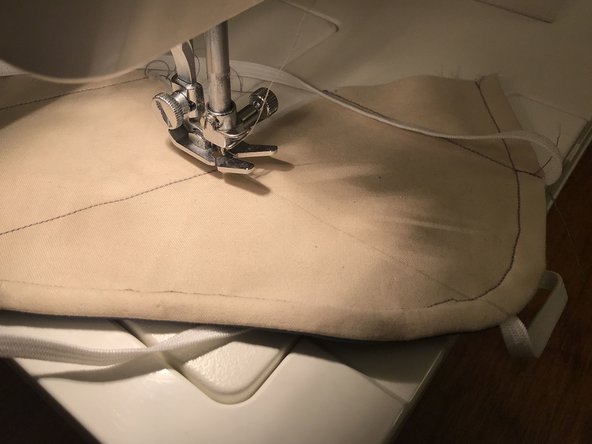
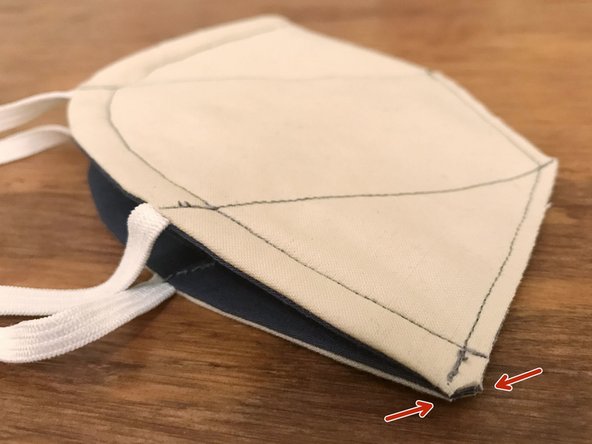
Carefully sew the center seam, running from the bottom corner to the upper straight line.
-
Stop and adjust your angle at the halfway point to follow the mask's contour.
-
Sew roughly 1/4" (6 mm) from the edge.
-
Stop at the point where the upper straight line meets the edge of the mask. See the orange arrow in the photo for reference.
-
-
-
Using your scissors, trim along the front seam that you just sewed, leaving about 1/8" (3 mm) of material between the sewn line and the edge.
-
Diagonally trim a tiny bit of material from the bottom corner of the mask, as marked, being careful not to cut through any of the sewn seams.
-
Discard the scraps.
-
-
-
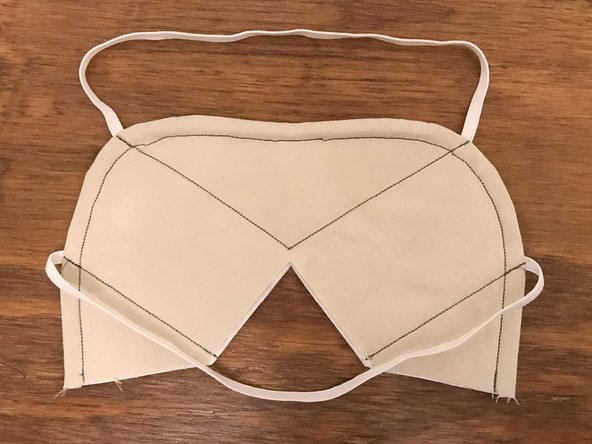
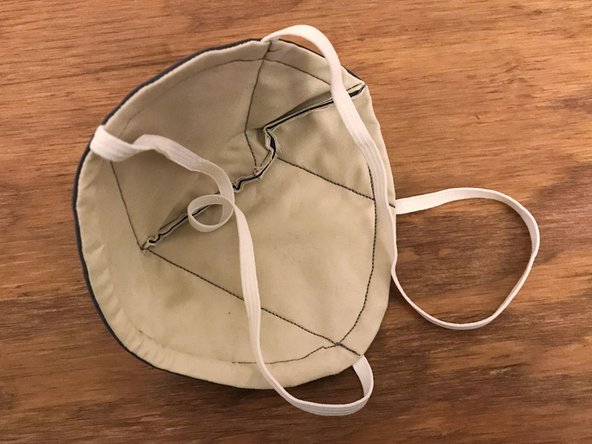
Open the mask and turn it inside-out. The stiffness of the interface material might make this process a bit crinkly.
-
Use your fingers to press the front seam outwards until the stitching is visible and the corners are crisp.
-
Fold and flatten the mask in half, with the outside surface facing out.
-
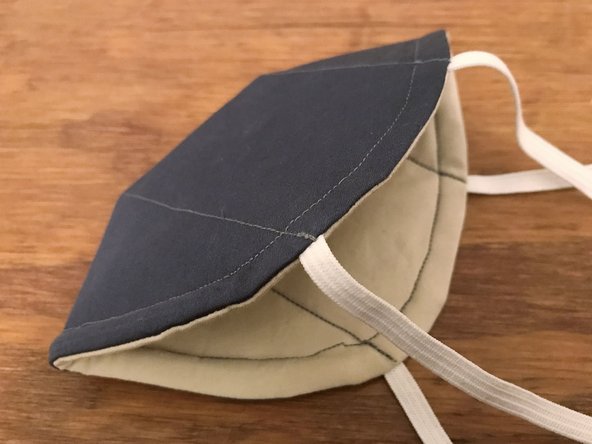
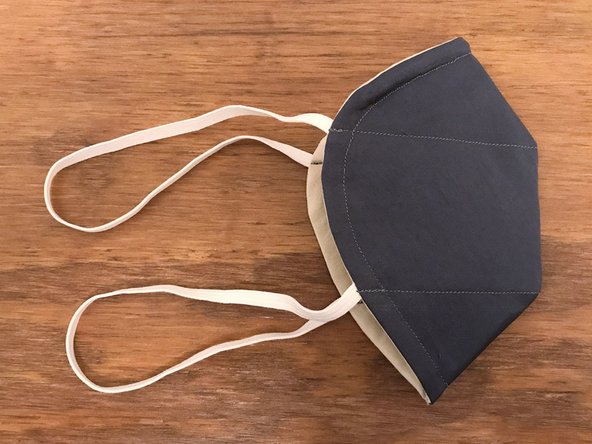
The mask is finished. Nice job!
-
-
-
WARNING: Wearing the mask will directly expose it to any germs that you're carrying. If you're planning to donate this mask, do not try it on yourself unless you're going to wash it before donating it. You can spread COVID-19 to others even if you don't have any symptoms yourself.
-
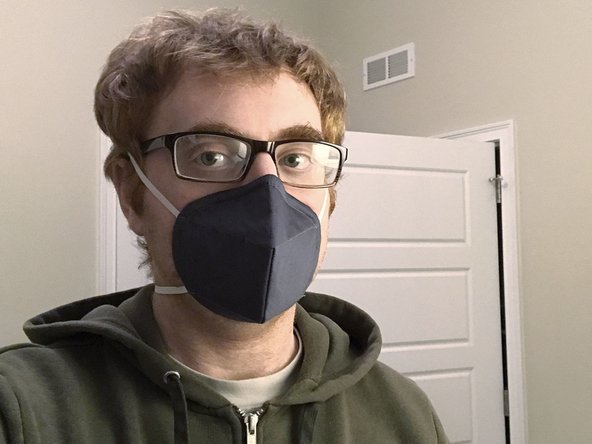
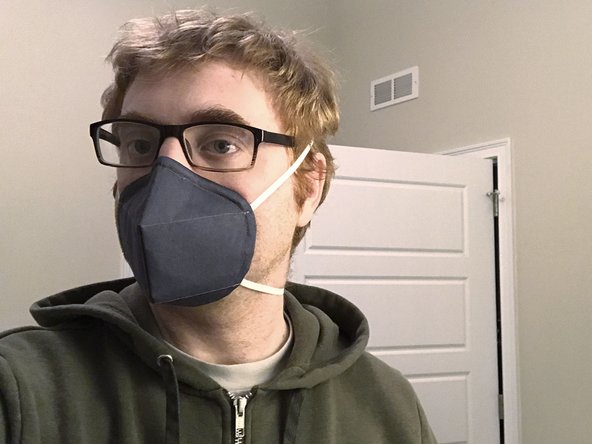
When wearing a mask like this, it should fit snugly around your nose and mouth.
-
Pinch down on the area around your nose and underneath your eyes. When you breathe, air should not escape from underneath the edges of the mask.
-
This means that if you wear glasses, your glasses should NOT fog up when wearing this mask properly. That's why the nose bridge insert runs along the top edge and extends all the way down to the upper strap.
-
This type of mask can NOT be used effectively by anyone with a beard.
-
You should be able to machine wash the mask in warm water and dry it on high heat. Test one in your washer and dryer to see how it holds up. The virus that causes COVID-19 is not believed to be able to survive exposure to laundry detergent and/or temperatures above 158ºF (70ºC).
-
If donating masks, I suggest sterilizing them and then sealing them in plastic ziplock bags or using an impulse sealer. Include a card that's visible through the plastic with information about the mask, including the date that it was packaged, the number of internal layers, and the specific materials that you used.
-
Please be safe!
-


Attached Documents
